

When I started this blog, designed in WordPress, my first thought was to start on my machine and when I would had been the design ready, then buy a domain to publish it. In the middle of that process, I was so excited about the project that I wanted to show it to my friends, in both platforms on my phone and their laptops. And I thought … why not deploy a hosting at home?
Is that possible? Can I do it with any cost? Ow yes! You can build a home hosting absolutely free! The first thing you need to know is what kind of Internet connection you have hired, that it going to tell you how you can connect with other users. In my case the ISP assigns me a Dynamic IP , that would be my “identification number”, so other users can connect with me using this IP. BUT, my IP is dynamic, that means it will change often, so you can not pass the IP to any friend to connect your machine :/
If your provider uses CG-NAT ask them if you can switch to Dynamic IP, in my case they changed it for free 🙂 But… What I really want is share with my friends a domain name like oubiti.com! Not an ugly IP like this 123.45.26.118!
Well, for that they invented Dynamic DNS. A DNS is a telephone directory but storing IPs, where you look for a domain name and you receive an IP. A dynamic DNS gives you the ability to change your IP as often as you want, which in our case it going to be the router whenever you receive a new IP from our ISP, whom will update that information on our Dynamic DNS service.
There are many companies that offer this free service, in my case I used https://www.noip.com/ , you can create an account easily, type the domain you want and create a free account, obtaining a Dynamic DNS.

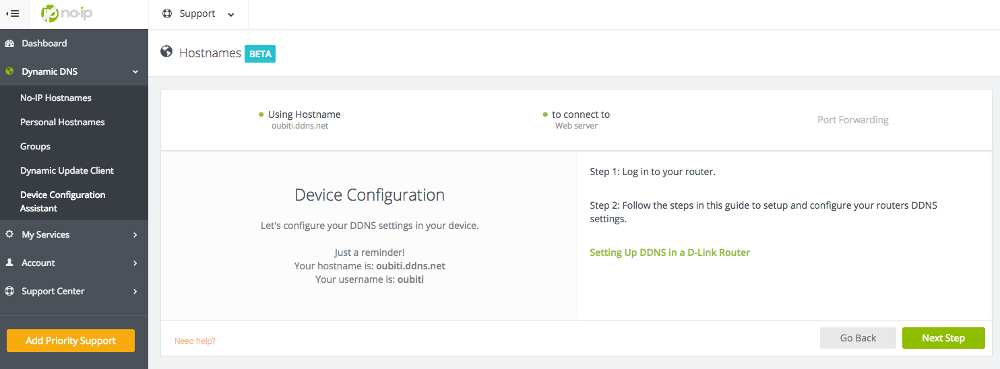
Once created, we must setup the router to be responsible for sending the new IP Dynamic DNS, every time it changes. To do this, follow the steps in the wizard to set up your router .
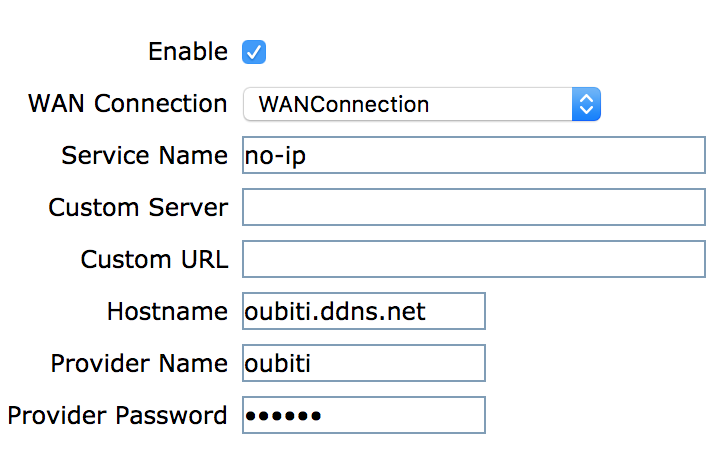
See an example of my config:
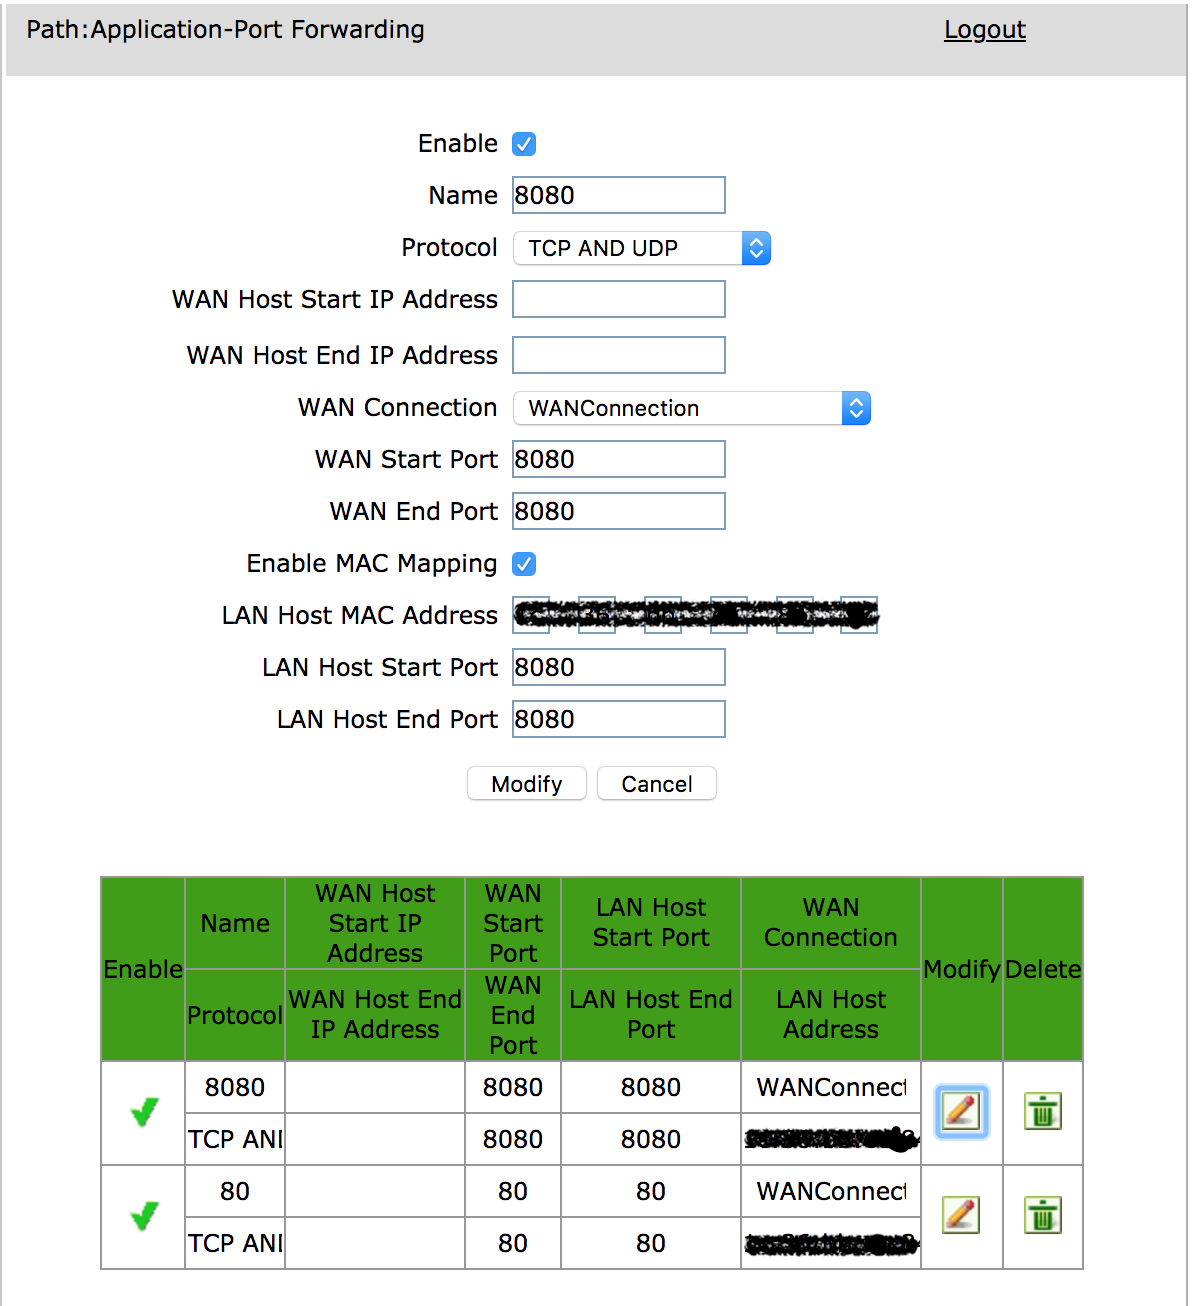
AH! An important step! Doesn’t matter if you use a Dynamic DNS or just the IP, but if you want that your public IP redirects the traffic of a web page to your web server, you will need to do a “Port Forwarding” , see here an example using port 8080 and 80.
So far so good! You just need to make sure you have your web server running, you can try http: // localhost and if that works properly, wait a few minutes for DNS information to propagate and you can connect to your machine using the domain name you’ve chosen.
As last step, I had an issue, a kind of loop in the name resolution. If something goes wrong when you try to see your website using the new domain name (in my case “oubiti.ddns.net”), try to add that line to your local name resolution file.

In another post, I will explain how to set up a web server with WordPress and MySQL database, using Docker containers!